Wednesday, December 24, 2008
Now that the rehab money is finally in (it only took 2 months) the real work is finally beginning to get started. The current goal is to go through the house room by room and get them to a livable state. It started this weekend with the installation of some wonderful par can lights in the rec room. While I understood the theory of electricity, I wasn't 100% on the practical application of said theory. It was pretty easy though. Step 1, cut holes in the drywall for the new lights and wires. The one mistake made here was not giving enough thought to keeping the drywall cutouts whole and making sure there was a ceiling joist within the cut out to re affix the piece. We could have used fishtape to run the wires, but there were places where the wire had to run through the joists, and the insulation would have reeked havoc on the fishtape. So using a little 4" circular saw set to 1/2" deep the holes were all cut out. Step 2, putting all the new fixtures and wires in. Again pretty easy. Eric wanted to use all of the new construction type junction boxes and light fixtures saying they were more stable in the end than the retrofit type so I think the holes are all bigger than if the retro stuff was used as we had to swing a hammer around in the wall. So the 2 par cans went up, nailed to the ceiling joists. They're kinda fun in that the mounts expand to fit what ever distance apart your joists are. A new junction box went in the wall, a new breaker in the panel (our attempt to organize the electrical in the house). Then wire was run from the panel to the switch, then from the switch to light 1 then from light 1 to light 2, all pretty simple. Step 3, putting back the drywall. This is where the chaos happened. As I said, the drywall was cut without any thought to putting it back up, so I got what I could up and filled in the gaps with Great Stuff. I know this is the WRONG way to do it, but I'm good at plaster work and I think I can get it flat. I hope...
Monday, December 15, 2008
There's a first for everything

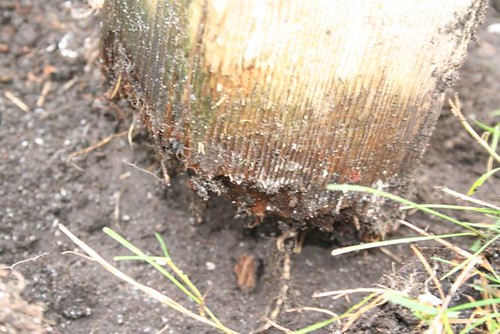
It was a weekend of firsts at the abode. It was the first snow. Boy am I glad the furnace is working over there. I'd be a Popsicle otherwise. It was also first christmas tree time too. I wanted something that could be planted in the yard, as there's no trees or anything now. So this little guy was bought to not only hold up decorations, but to provide enjoyment for years to come .

Tuesday, December 9, 2008
The backwards life
It dawned on me last night while cleaning up my tools how backwards the life of a home renovator really is. All my tools and supplies are comfortably living in my house, while all my furniture is in the shed out back. Then there's my kitchen. It's serviceable the way it is, I have running water, cooking appliances, but I want to take that all away in the name of beauty. Same thing goes for my bathroom. There are places in this world where a dirt floor and a fire pit are all that's required. Who am I to say that carpet is really needed when concrete is more than many have.
Monday, December 8, 2008
Keep on truckin
It was another big weekend at the abode. I've decided to go on a beautification binge. Even though it will all be replaced, sooner or later, I decided to go around and paint all the trim, with a great $10 bucket of paint from the Restore. It started off with the trim around the top of the flat roof. Some of the flashing was rusting and it just looked like poop. So up I went, laying face down on the roof and hanging over the edge. I'm sure it was quite the sight. Next on the list was the back patio posts. While I was scraping of the old and peeling paint I came to find out that 1 of the posts was no longer attached to anything. Off we went to Home Depot for a bag of concrete to make these great little foundations. The post painting got held up for fear of unsettling the curing concrete, but I did bondo all the edges that had been mangled the next day.
Eric found a guy selling food grade 50 gallon barrels out of his front yard for $10.00 a piece (112th between canyon and vickery in Tacoma). My dreams of a rain barrel for the soon to be garden came a little closer to reality. We grabbed 2, one for a composter and one for a rain barrel. Some day they'll actually get put together. I'm just glad the weather has been holding up to work on some of my outdoor projects.
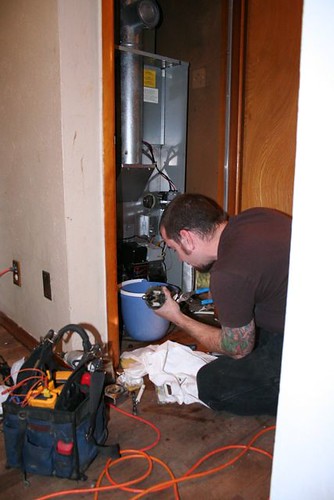
Inside, Eric has decided to get the old oil furnace up and running. We don't see many of these on the west coast, most people have either natural gas (as this house will some day have) or propane. The first problem was the tank, it wasn't firmly seated and one of the legs had collapsed, a quick shove got it out of the way so we could tackle the next part of the problem, being the oil line. It had a kink in it which got cut out the end of the line got cleaned up with a little sand paper. Until the tank issue gets fixed, we're using a 5 gallon jerry jug of diesel for fuel. The end of the line was carefully bent and dropped down into the jug of diesel. Next it was onto the furnace. Oil furnaces are quite dangerous things, the atomized fuel can easily cause explosions. I would recommend that even the most seasoned diy'er leave this to the pros. Luckily I have an in house pro saving me from spending the $300 that it would cost for the same tuneup.
 --Eric--
The first thing I took a look at was the filters. The return air grills(R/A's for those in the trade, the big ones probably in the ceiling or walls for those less familiar) didn't contain any, which needs to be remedied. The furnace its self could also contain filters if the R/A's don't have any (while they can be in either place, they can't be in both, if you have 2 in a row like that the filters restrict the air flow too much, like if you were to wear 2 dust masks and trying to breathe). Realizing there was no filters, I was concerned about the blower and motor having been plugged up. I pulled off the vent flue at the front of the furnace and opened up the blower access hatch. They looked ok so I moved onto the heat exchanger (this is the part that heats the air and separates the combustion chamber and all it's toxic emissions from the air that heats our homes) which has it's own inspection port. It was 1/4 inch thick with soot in spots, this is a big problem which generally indicates the need of a new furnace. We're only going to use it to get through this winter, so I vacuumed it out as well as the clean-out ports on the unit. Next it was onto the burners. The ignitor - transformer assembly which after disconnecting the fuel line and turning the screw flips right open. After opening it up I pulled out the ignitor - burner assembly. The ignitors were burned down and black with soot and the oil nozzle was caked with an oily sooty mess. For those of you with an oil furnace the oil nozzle should be replaced whenever you get it serviced (which should be yearly). At this point we ran off to McLendond Hardware for a new oil nozzle. I replaced that and the ignitors. Once it was all back together and the ignitors were adjusted, I test fired it to no avail. It was getting late so I'll have to get back to it another time and figure out why the darned thing wouldn't fire up.
Monday, December 1, 2008
Thanks
Happy Thanksgiving. What am I thankful for? Well my house of course. I'm also thankful for my job, having employment in the construction industry in this economy is a little scary. I have a great boss and enjoy my days. I'm thankful that I separated from my Ex relatively painlessly. I'm thankful of my Eric, for all he does to help me, and the love he shows me.
It was nice to have the long weekend for house projects. In an effort to paint the hallway (it's the grossest thing left in the house...well next to the upstairs) I filled in all the holes and attempted to repair the drywall that had all been knocked off the corners, too bad it still isn't dry enough to sand yet.
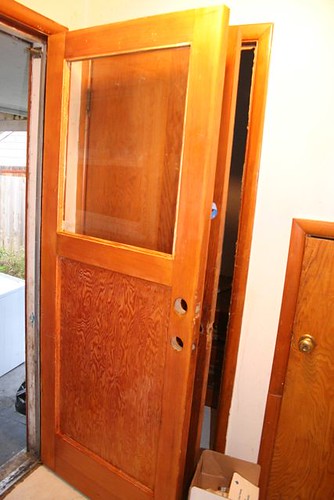
I also continued my back door experiment. My first coat was 1/2 alcohol 1/2 shellac, it went on great looked great marvelous stuff to work with. Thanks Gary at This Old crack House for extolling its virtues. My second coat was a complete disaster. I wanted to go darker so I added some alanine dye, the results were a streaky blochy mess that also dissolved the caulking from around the window and just looked terrible. Time to sand it all down and try again. This time I think I'll probably use stain as opposed to the dye.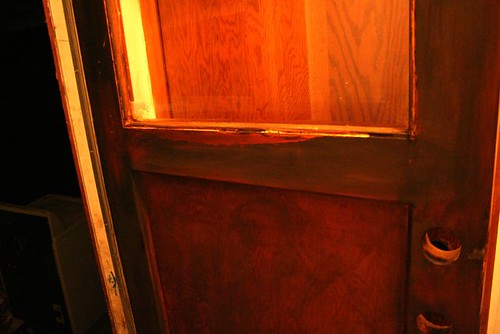
Eric took a go with the shoddy electrical in the house and installed a motion sensor light for the front drive way. I don't think it was as bad as the kitchen, which leaves hope for the rest of the wiring in the house. I want to get one of the solar motion detector combo thingies for the back since there's no power that runs out that way.
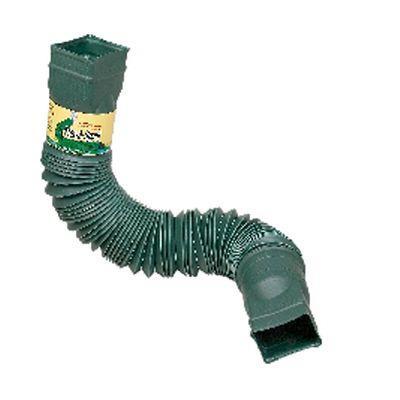 Lastly, we fixed the gutter system on the house. I figure it's better to do now, then once the winter rains really set in. I just wish I'd taken some pictures. Out front, what we did was dig a foot deep trench going away from the house. Put little extender guys on the bottom of the downspout then attached one of these green flexie things then connected some of the black drainage pipe to the end. The home inspector said that the gutters had to drain 5 feet from the house, which I don't think is correct looking at every one elses gutters that drain a couple feet from their foundations, but since this one was on an inside corner and next to the sidewalk, I figured longer was better. Once the drainage contraption was in place we buried the pipe end in pea gravel to act as a drainage field then filled the rest in with dirt. It was a great success, I can't wait till it rains. On the side of the house we did the same thing but we had to replace the whole downspout and only used the green flexie thing. Eric also streightened out the gutter so now it should be right as rain (hehe). There is still one missing downspout, but I'm saving it for when the side yard gets turned into a garden and I'm going to use it to fill a rain barrel. I've been reading through Casa Decrepit and really enjoy their tales of Urban Farming and I think I'd like to try my hand at it come spring.
It was nice to have the long weekend for house projects. In an effort to paint the hallway (it's the grossest thing left in the house...well next to the upstairs) I filled in all the holes and attempted to repair the drywall that had all been knocked off the corners, too bad it still isn't dry enough to sand yet.
I also continued my back door experiment. My first coat was 1/2 alcohol 1/2 shellac, it went on great looked great marvelous stuff to work with. Thanks Gary at This Old crack House for extolling its virtues. My second coat was a complete disaster. I wanted to go darker so I added some alanine dye, the results were a streaky blochy mess that also dissolved the caulking from around the window and just looked terrible. Time to sand it all down and try again. This time I think I'll probably use stain as opposed to the dye.
Eric took a go with the shoddy electrical in the house and installed a motion sensor light for the front drive way. I don't think it was as bad as the kitchen, which leaves hope for the rest of the wiring in the house. I want to get one of the solar motion detector combo thingies for the back since there's no power that runs out that way.
Lastly, we fixed the gutter system on the house. I figure it's better to do now, then once the winter rains really set in. I just wish I'd taken some pictures. Out front, what we did was dig a foot deep trench going away from the house. Put little extender guys on the bottom of the downspout then attached one of these green flexie things then connected some of the black drainage pipe to the end. The home inspector said that the gutters had to drain 5 feet from the house, which I don't think is correct looking at every one elses gutters that drain a couple feet from their foundations, but since this one was on an inside corner and next to the sidewalk, I figured longer was better. Once the drainage contraption was in place we buried the pipe end in pea gravel to act as a drainage field then filled the rest in with dirt. It was a great success, I can't wait till it rains. On the side of the house we did the same thing but we had to replace the whole downspout and only used the green flexie thing. Eric also streightened out the gutter so now it should be right as rain (hehe). There is still one missing downspout, but I'm saving it for when the side yard gets turned into a garden and I'm going to use it to fill a rain barrel. I've been reading through Casa Decrepit and really enjoy their tales of Urban Farming and I think I'd like to try my hand at it come spring.
Subscribe to:
Posts (Atom)
